Ever flushed a toilet and wondered where it all goes? The answer, if you live beyond the reach of the local sewage network, might lead you to an unsung hero of modern life: the domestic sewage treatment plant. These off-mains drainage solutions quietly convert the messy realities of daily life into something far more palatable - clean, treated water that can safely re-join the environment.
But installing a sewage treatment plant isn't just for eco-conscious rural retreats. These systems can be vital solutions for growing communities, new developments, and even established properties seeking greater independence from city sewers. Whether you're navigating off-grid living, looking to avoid costly sewer line extensions, or simply prioritizing environmental sustainability, having a sewage treatment plant properly installed is vital. This guide is intended to help you make sure that it is.
Note: This article assumes that you are fully aware of all the off-mains solutions available to you and that you have chosen a sewage treatment plant to be the most suitable. If you are unsure about any of this, we recommend first taking a look at our guide to off-mains drainage article.
Can you install a Sewage Treatment Plant yourself?
In the interests of being upfront and honest, we do not recommend installing a sewage treatment plant yourself unless you are 100% confident in your ability to do so. If incorrectly installed, an off-mains sewage system can leave you in a nasty mess; both physically and legally. Hiring a professional contractor to do the installation for you is the best way to give you peace of mind that your system is suitable for your needs, reliable and legally compliant.
However, if you have the skills and experience to install one yourself, the following guide will take you through various steps and stages involved in planning and preparing for your installation.
Note: This guide is intended as a recommendation of points to consider when planning to install a sewage treatment plant. It is not intended to be taken as legal advice, nor does it cover all aspects of installation for all types of STP. Professional advice should always be sought to better understand the legalities of installing your system, and the manufacturer's recommendations and guidance should always be taken over those mentioned in this article, should they conflict in any way.
How to Install a Sewage Treatment Plant
By now, you’ll have become an expert on all the legalities, requirements and rules surrounding the installation of a domestic sewage treatment plant system. You will have designed said system to perfectly fit your property, while remaining fully compliant with said rules and regulations, and have placed an order for the most suitable sewage treatment plant. Now comes the hard work... installing it all!
This is where we need to reiterate our recommendation that the installation of a sewage treatment plant should always be carried out by a suitably trained and qualified professional. If any part of your private sewage system is installed incorrectly, you could be faced with repair costs, and potentially hefty fines, that will be far greater than the original cost of hiring a professional installer.
However, if you still feel you are up to the task of a DIY install, the manufacturer of your chosen tank will provide you with a detailed manual that will give step by step instructions on how to do it, as well as advising you of all the health and safety measures that should be taken. The following is a list of the general steps involved, but please make sure you adhere to the manufacturer’s guidance during the actual install, as some steps may vary and you will need more detailed instructions than what is provided here.
As a brief guide, the following list of the general steps should give you an idea of what will be involved.
Step 1 - Make sure you are prepared
Once your sewage treatment plant has been delivered, the following checks should be carried out before the installation begins:
- Inspect tank for damage - tanks will normally have been fully tested and checked before being dispatched to you, but it isn’t uncommon for them to become damaged during transportation and offloading. Make sure to thoroughly inspect the tank when it arrives as, once the tank is installed, most manufacturers won’t accept claims for damage.
- Check you have the correct invert depths - you should have already checked the depth of your incoming pipework during the site survey and design stage of your project and ordered a tank with the appropriate invert levels. However, It is worth checking this again, though, to ensure that the physical tank delivered will still connect to your existing pipework and remain within the maximum permissible depth.
Once you are happy with the condition of the tank, we recommend taking the following steps to make sure that you are fully prepared to install your sewage treatment plant:
- Carefully read the full installation guide that will be provided by the tank manufacturer.
- Double-check that you have the correct Building Regulations approval.
- If required, make sure that consent of discharge has been received from the environment agency.
- Have a pump available on site in case the hole you dig begins to fill up with either rising groundwater or heavy rainfall during installation.
If all of the above is in order, the last thing to do is check that your plans include considerations for:
- Sitting the tank – check your planned install location against the guidelines in the install manual, as the manufacturer may recommend extra conditions and minimum distances specific to their tank.
- Ventilation arrangements - this can often be overlooked, but it is important to ensure your system is well-vented to prevent odour issues on site. Ideally, there should be a vent on the treatment plant and, if you have a drainage field, venting at the ends of the percolation trenches, too. Contact our technical team for advice if you are unsure of the best arrangements for your site.
Step 2 - Excavate the hole
You need to dig a hole that is large enough for both the tank and any recommended backfill, making sure that you follow the manufacturer’s detailed health and safety guidelines that will be provided in the manual as you do.
Remember to consider the required drainage falls. This should have been part of your planning already, but it is worth double-checking, especially for a gravity system. Typically, these will be 1 in 60/70 between the house and tank, and a maximum of 1 in 200 for a drainage field.
Step 3 - Install the base
Your sewage treatment plant will need a solid, stable base to sit on in the hole to prevent unnecessary stress from being placed on it during operation. This will often need to be a concrete one, but check the manufacturer’s recommendations in their installation guide to be sure.
Step 4 - Sit the tank
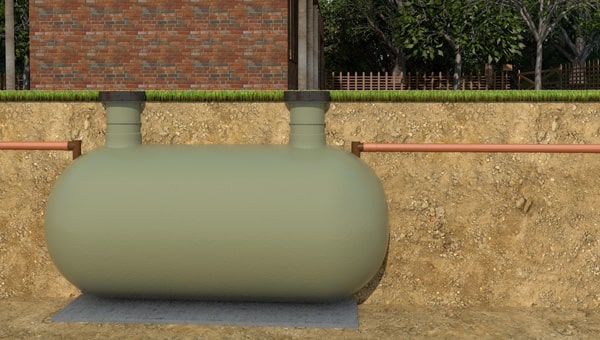
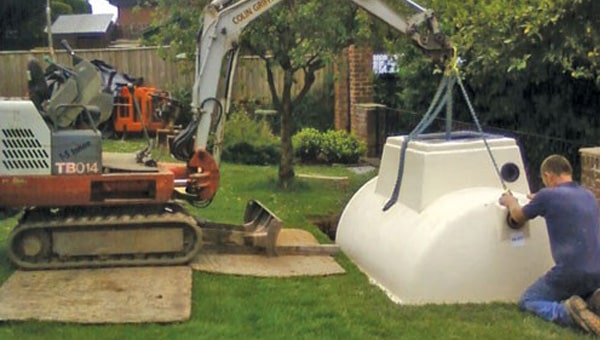
Once you’ve allowed enough time for the base to set, you’ll now need to lower the tank down into the hole and sit it in place. Make sure you are using the lifting system recommended by the manufacturer, check that the inlet and outlet orientations are correct, and ensure the tank is level.
Step 5 - Backfill the hole
With the tank in place, it’s time to backfill around it to make sure it stays safely secured in the ground. Concrete, gravel, or sand are the most common recommendations for suitable backfill material, but check the instruction manual to see what the manufacturer advises and follow their steps first and foremost.
Step 6 - Install a septic drainage field
If you plan to discharge to a drainage field (likely because discharge to a watercourse isn’t possible or permissible), now would be a good time to install it, assuming one doesn’t already exist on the property. If you need any help or advice with this, we have two separate guides that cover how to correctly size and properly install a septic drainage field.
Step 7 - Connect the pipes
Assuming that everything has gone to plan thus far, connecting up the pipework to the inlet and outlet points on the tank should be fairly easy. The inlet should receive the connection from the property and the outlet should be connected up to the discharge pipework.
It is worth noting, though, that some manufacturers advise the added installation of inspection chambers before and after the treatment plant for easier maintenance access should problems arise in the future. Make sure you check the installation manual and follow their recommendations.
Step 8 - Connect the electrics
Next, you will need to wire up the electrical connection that gives power to the treatment plant. Unless you are a qualified electrician yourself, please leave all electrical work to a professional. The installation manual will detail the steps required, but we strongly advise against trying to do this yourself.
Step 9 - Fit the manhole cover(s)
The final step should be to fit the correct cover and frame over any access points your tank has. Assuming you provided the sewage treatment plant supplier/manufacturer with the correct details of your site, the most suitable manhole covers should already be provided. However, it is worth noting that manufacturers will always assume the plant is going to be installed in a traffic-free area unless told otherwise. If this is not the case for your installation location, it is highly recommended that you contact a structural engineer before installing your system.
This was just a basic look at the things you need to do when installing your sewage treatment plant. It is not a comprehensive guide by any means; that is what the manufacturer’s installation manual is for. However, it should at least give you an idea of the general steps involved.
To round things off, here are a few key things that you should ensure you DON’T do when installing your system.
What Not to do when installing a Sewage Treatment Plant
Whan installing a sewage treatment plant, make sure that you DO NOT do any of the following:
- Subject the tank to impact or contact with sharp edges
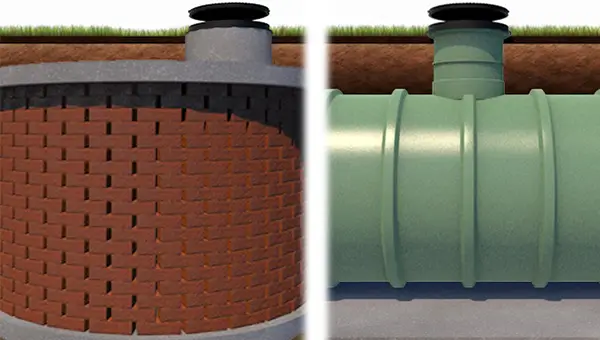
- Add neck extensions to the tank, nor build a brick manhole above the tank neck (as this increases burial depth of the tank) as it is not recommend extending the neck of the tank under any circumstances
- Install the tank deeper than the depth that the fitted neck will allow
- Install in trafficked areas without a suitable backfill design
- Site the tank so that it is subjected to excess ground pressure (e.g. sloping ground) or applied loads such as may be generated by vehicular traffic
- Fill an unsupported tank
- Backfill an empty tank
So there it is. That’s our guide to all of the things you need to do when installing a sewage treatment plant. Hopefully, you can see that it is a task no sane person should want to undertake themselves without professional help. We cannot stress enough the importance of at least seeking expert advice to help with your planning.
When you consider that the cost of having a sewage treatment plant installed professionally can sometimes be equal to the cost of the plant itself, you may think it a better option to do the job yourself and save the money. However, it would most likely only be a saving in the short term. Unless the system is installed by a registered professional, you may find that offers of warranties and guarantees are automatically void. If the system was installed incorrectly, or fails due to undetected damage or manufacturing fault, you are unlikely to be covered and will have to incur the full cost of fixing the system yourself.
Our recommendation is to do it right, plan for the extra cost in your budget, and hire a reputable sewage treatment plant installer.
Whatever you choose to do though, the physical installation of the system is not the end of this journey. Once the tank is in the ground and everything is connected up, you need to turn your attention to its operation and maintenance.
If you have any questions or need any further advice on how to install a sewage treatment plant, contact us today. Our technical team is always on hand to help with all of your drainage needs.


