A well-planned Twinwall drainage system installation ensures efficient water management and a long-lasting solution for your application. As with any DIY project, however, you might not always know all the things you need to consider beforehand.
In this article, we’ll attempt to help you avoid the common pitfalls and ensure you are as prepared as possible to move on to the actual installation of your twinwall drainage system. The first thing to always check is whether or not you need to seek permissions or adhere to any specific regulations.
Twinwall Installation Permissions and Regulations
The rules, regulations and guidelines for installing a twinwall drainage system can differ significantly depending on the location and application. Therefore, it is important to always check the following:
- Contacting Your Local Building Authority - This is your first and most important step. Your local building authority (council or relevant department) can advise you on:
- Permit Requirements - Depending on the size and complexity of your project, a permit might be necessary. The authority can clarify the specific permit you might need (e.g., building notice, planning permission) and the application process.
- Drainage Bylaws - These are local regulations governing drainage systems. Familiarise yourself with any specific requirements outlined in the bylaws, which might cover aspects like discharge points, soakaway design, or minimum pipe depths.
- Building Regulations - For most drainage projects, adhering to national building regulations is essential. In the UK, Building Regulations Part H (Drainage and Wastewater Disposal) sets performance standards for drainage systems. While it doesn't specify Twinwall pipes by name, it outlines criteria for factors like:
- Adequate Drainage Capacity - The system must be able to handle the expected water flow from the area it serves.
- Preventing Flooding - The design should prevent water from accumulating around buildings or causing flooding on neighbouring properties.
- Suitable Discharge Point - The final destination for the drained water (drain, soakaway, etc.) needs to be appropriate and comply with any local bylaws.
- British Board of Agrément (BBA) Certification - While not always mandatory, BBA certification signifies that Twinwall pipes meet specific performance standards set by the BBA. Here's what to consider regarding BBA certification:
- Project Requirements - Some local building authorities or drainage professionals might recommend using BBA-certified pipes for specific projects, particularly for critical drainage applications.
- Peace of Mind - BBA certification provides additional assurance of the pipe's quality and suitability for the intended purpose.
Important Note: Regulations and requirements can vary depending on your location. It's always best to consult your local building authority and any relevant drainage professionals to ensure your Twinwall drainage system installation complies with all necessary regulations and best practices.
Planning a Twinwall Drainage System
A well-planned Twinwall drainage system layout is the foundation for optimal water management. In order to do the job right, you’ll need to first assess the drainage needs of your installation location and then create a drainage map to help ensure you have thought of everything needed before you start digging any holes. Here's a quick look at the steps involved for each:
Assessing Drainage Needs
This initial stage involves a thorough evaluation of your drainage requirements. In order to give yourself enough information to make the right choices for your system, you’ll need to consider the following:
- Identify Drainage Areas - Pinpoint the specific areas on your property that require drainage. This could include driveways, patios, walkways, basements, gardens, or agricultural fields.
- Water Flow Direction - Analyse the natural flow of water on your property. Where does rainwater or excess water tend to accumulate? Understanding this flow pattern is crucial for directing water towards the drainage system.
- Drainage System Capacity - Estimate the volume of water the system will need to handle. Consider factors like the size of the area being drained, rainfall patterns in your region, and peak water flow during heavy rain events.
- Discharge Point Selection - Choose the final destination for the collected water. This could be a connection to a municipal drain, a soakaway system (subject to local regulations), or a water harvesting system (for non-potable water use).
Creating a Drainage Map
Once you've assessed your drainage needs, it's time to translate that information into a clear and concise plan. Here's how to create a good drainage map:
- Sketch the Layout - Draw a basic plan of your property, including buildings, driveways, and other relevant features.
- Map the Pipe Path - Mark the planned route for the Twinwall pipes on your sketch. Consider the following factors when determining the pipe path:
- Straight Runs with Minimal Bends - While some bends might be necessary, prioritise straight runs and avoid sharp changes in direction for efficient water flow.
- Maintaining a Gradient - The pipe path should slope slightly downwards towards the discharge point. The recommended gradient will depend on the pipe diameter and flow rate, but a minimal slope is essential to ensure proper drainage. A fall of 1:80 (or 12.5mm per metre) should be good for most domestic installations.
- Inspection Chamber Placement - If you need to create a large drainage system, it might be worth adding inspection chambers at strategic points to allow access for cleaning and maintenance. The most suitable location for these is at any changes in the direction of the pipeline.
- Avoiding Obstacles - Identify any underground utilities or existing structures and ensure the pipe path avoids them. Remember to contact utility companies before excavation to locate underground lines.
- Mark Key Elements - Include details like pipe diameters, locations of bends and junctions, and the position of inspection chambers on your drainage map. This will serve as a valuable reference during installation and future maintenance.
Choosing the right components
With the plan laid out, you next need to choose the right twinwall pipes and fittings, etc., from which to build your system. Here’s a quick look at the typical components of a twinwall drainage system:
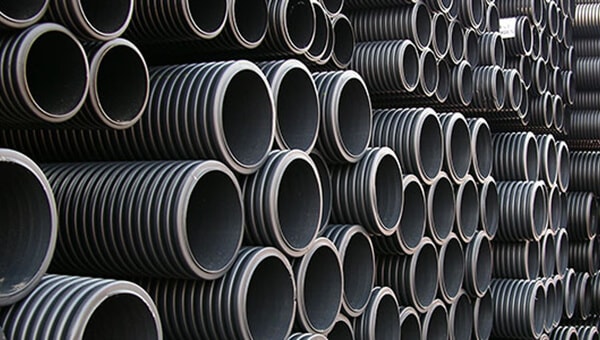
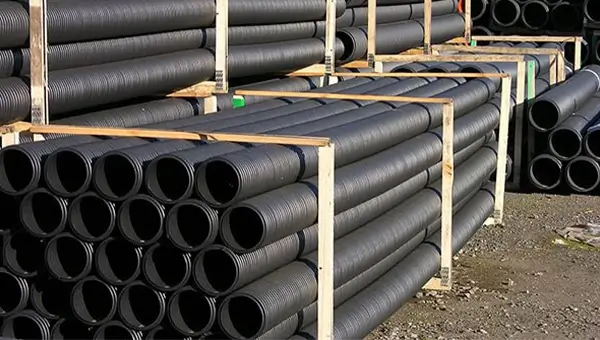
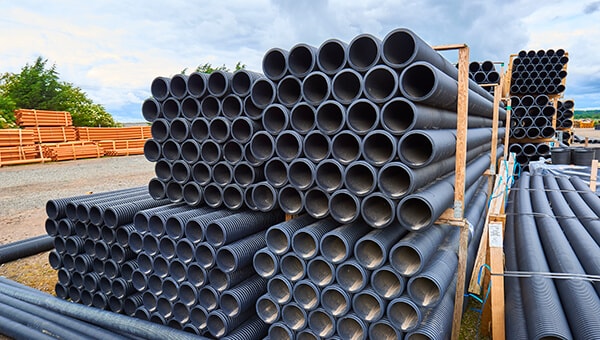
- Twinwall pipes – Depending on whether you want your system to absorb ground water or simply transport it elsewhere, you’ll first need to choose between Perforated Twinwall Pipes or Unperforated Twinwall Pipes. You’ll next need to decide what diameter will best suit your needs. For more information on suitable applications for each size, check out the “Choosing the Right Size Twinwall” section in our Basic Guide to Twinwall article.
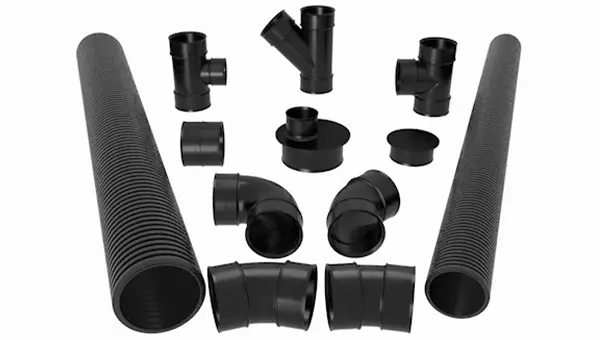
- Twinwall Fittings – Couplers, bends, junctions, and end caps are all likely to be needed, depending on the complexity of your drainage system. These will all need to be of equal size to your chosen pipe diameter.
- Gravel - Recommended for creating a stable base layer in the trench for your pipes to lay on. It is also necessary for improved filtration if you are installing a perforated twinwall drainage system.
- Geotextile Membrane – Recommended again for perforated twinwall systems to help prevent unwanted soil and debris from entering the pipes.
- Inspection Chambers – Recommended for large twinwall drainage systems or complex ones with lots of bends and junctions. They provide convenient access points for monitoring and maintaining the system.
For a more detailed breakdown of the components mentioned here, have a read of our companion article, “What do you need to construct a Twinwall drainage system?”.
Additional tips for planning your twinwall system
- Use Graph Paper - Graph paper allows for accurate scaling and easier visualisation of the pipe layout.
- Digital Tools - Consider using digital design software or online tools to create a more detailed plan, especially for complex projects.
- Seek Professional Guidance - For intricate drainage projects, consulting with a qualified drainage professional can be highly beneficial. They can help assess your needs, design an optimised layout, and ensure compliance with regulations.
By taking the time to meticulously assess your drainage needs and map out a well-planned system layout, you can lay the groundwork for a successful and efficient Twinwall drainage system installation.
Twinwall Drainage Trench Considerations
Once you have a finalised system layout, you need to think about the trench you will have to dig to facilitate the laying of the pipes underground. Here's a breakdown of the key considerations for successful trenching.
Soil Removal
- Excavation Depth - The depth of the trench should be determined by several factors:
- Frost Line - Generally, the trench depth should be below the maximum expected frost line in your area. This prevents the pipes from being damaged by freezing and expanding soil. Local building codes or your local building authority can provide information on the frost line depth in your region.
- Pipe Diameter - Larger diameter pipes typically require deeper trenches. Refer to the specific manufacturer's recommendations for the chosen pipe size, as depth requirements can vary slightly depending on the brand and application.
- Soil Conditions - Loose or sandy soil might require a deeper trench for stability. Conversely, very firm or rocky soil might limit how deep you can realistically excavate.
- Spoil Removal - The excavated soil (spoil) should be removed from the trench and stored away from the excavation edge to prevent cave-ins. You can plan to reuse the spoil for backfilling the trench later or dispose of it responsibly, depending on the soil composition.
- Shoring (Optional) - For deep trenches, especially in unstable soil conditions, shoring might be necessary to prevent trench walls from collapsing. This can involve using wooden planks, steel sheets, or trench boxes to secure the excavation. Consult a qualified professional if you're unsure about trench shoring requirements.
Trench Gradient
- Maintaining Flow - The trench bottom should have a slight gradient that slopes continuously towards the discharge point. This gradient ensures proper water flow through the pipes and prevents water from accumulating in the system.
- Recommended Gradient - The ideal gradient will depend on the pipe diameter and the expected water flow rate. Generally, a minimum gradient of 1 in 80 (a 1mm drop for every 80mm of pipe run) is recommended. Steeper gradients might be necessary for larger-diameter pipes or high-flow applications.
- Checking the Gradient - Use a level and a straightedge to ensure the trench bottom maintains the desired gradient throughout its length.
Trench Width
- Pipe Size and Installation Manoeuvring - The trench width should be sufficient to accommodate the chosen pipe diameter while allowing enough space for proper installation. Consider the following:
- Minimum Width - Ensure there's enough space on each side of the pipe for proper sidefill (minimum of 150mm either side) and backfilling. Refer to the manufacturer's recommendations for the specific minimum trench width required for your chosen pipe size.
- Manoeuvring Space - Leave some additional space, particularly for larger diameter pipes, to allow for easier handling and connection during installation.
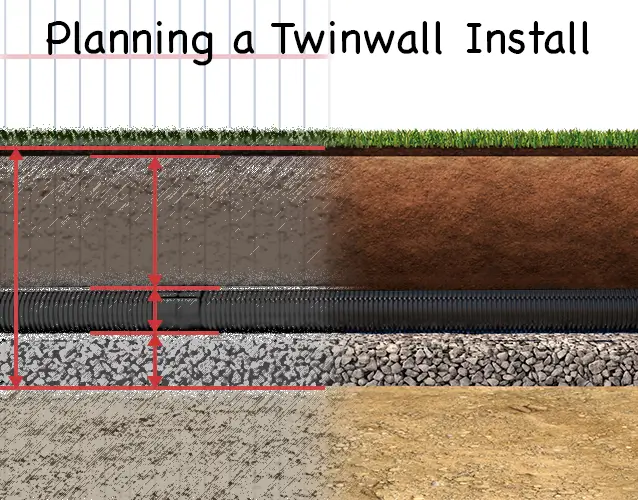
Minimum Trench Depths and Widths for Twinwall Pipes
Here's a table outlining some general recommendations for trench depths and widths based on common Twinwall pipe sizes. Remember, these are general guidelines, and specific requirements might vary depending on the manufacturer, soil conditions, and local regulations. Always consult the manufacturer's recommendations for the specific pipes you're using and confirm trenching requirements with a qualified professional if needed.
| Recommended Twinwall Trench Depths and Widths | |||||
|---|---|---|---|---|---|
| Pipe Diameter | Minimum Trench Depth (Standard Conditions) | Minimum Trench Depth (High Frost Conditions) | Recommended Frost Line Buffer | Minimum Sidefill (on either side of pipe) | Minimum Trench Width |
| 110mm | 710mm | 860mm | Below frost line + 150mm | 150mm | 410mm |
| 150mm | 750mm | 900mm | Below frost line + 150mm | 175mm | 500mm |
| 225mm | 825mm | 1025mm | Below frost line + 200mm | 200mm | 625mm |
| 300mm | 900mm | 1150mm | Below frost line + 250mm | 225mm | 750mm |
| 375mm | 975mm | 1275mm | Below frost line + 300mm | 250mm | 875mm |
| 450mm | 1000mm | 1350mm | Below frost line + 350mm | 275mm | 1000mm |
| 600mm | 1200mm | 1600mm | Below frost line + 400mm | 300mm | 1200mm |
The trench width needs to accommodate the pipe's diameter, plus enough space on either side of it to add a suitable gravel fill.
For Example - the trench for 110mm pipe would need to be at least 410mm wide:
150mm (Sidefill) + 110mm (Pipe Diameter) + 150mm (Sidefill)
When installing perforated pipes, however, the wider the trench is, the better the drainage capacity will be, as the gravel side and backfill around the pipe does a lot of the work. Therefore, we would recommend making your perforated twinwall pipe trenches as wide as is sensibly possible for your installation area (i.e. maybe double the recommended width if you can, but don’t fill your entire garden with gravel).
For all pipe diameters, the depth of the trench will, generally, require calculating the depth of the surface layer you want to remove, plus 300mm of backfill, plus the height of the pipe, plus 150mm of gravel beneath the pipe.
For example – Installing 110mm Twinwall in a garden might require a trench that is 710mm deep:
150mm – to allow for careful removal of the grass layer.
+
300mm – to allow for adequate backfill material above the pipe.
+
110mm – to allow for the pipe to be buried at the right depth.
+
150mm – to allow for a good base of gravel for the pipe to sit on.
This, however, would leave the pipe just under the average frost line in the UK, which is typically 450mm. If you are installing the system in an area that is susceptible to very hard frosts in the winter, it might be worth accounting for this and adding a frost line buffer to where the pipe will sit within the trench, as shown in the table above.
Remember! This will be the Minimum depth that your trench will need to be at the point furthest away from the discharge point. To ensure a proper drainage gradient is applied, you’ll need to add at least 12.5mm to the depth for every metre it is long.
For example – if your minimum depth is 710mm and the trench is 3m long, it will need to be 747.5mm deep at the point of discharge (710mm + 37.5 (12.5mm x 3)).
By carefully considering these factors and following the recommended practices, you can ensure your trenches are properly prepared for efficient and successful Twinwall drainage system installation.
Important Note: These are just general recommendations based on typical applications. The specific trench depth and width requirements can vary depending on factors like the chosen pipe system, soil conditions, and project specifics. Always check the manufacturer's recommendations and consider seeking guidance from a qualified drainage professional for the most accurate trenching specifications for your project.
Check for Underground Utilities before installing a Twinwall System
Before commencing any excavation work, including trenching for your Twinwall drainage system, it's imperative to locate and protect any underground utilities that might be present. Accidental damage to these utilities can be dangerous, disruptive, and costly. Here's what you need to do:
- Contact Utility Companies - This is the single most important step. Contact all relevant utility companies in your area well in advance of starting any excavation work. Provide them with the details of your project, including the planned trench location.
- Typical Utilities - These might include electricity, gas, water, sewer, telephone, and cable companies. Each utility company will have a specific process for locating their underground lines.
- Marking Services - Many utility companies offer free or at-cost marking services. These services involve trained personnel visiting your site and using specialised equipment to locate and mark the underground location of their utilities with paint or flags.
- Respect the Markings - Once the utilities have been marked, it's crucial to respect these markings throughout your excavation process. Avoid digging near or below the marked locations.
- Private Locating Services - In some cases, utility companies might not offer marking services for specific types of utilities, or you might be responsible for locating private utilities (like irrigation systems). Consider hiring a private utility locating service for comprehensive underground utility detection. These companies use advanced equipment like ground penetrating radar to pinpoint the location of buried utilities.
- Hand Excavation Near Utilities - Even after locating utilities, exercise extra caution when excavating near marked utility lines. Use hand-digging tools like shovels instead of power equipment to minimise the risk of accidental damage.
- Maintain a Safe Distance - If you encounter an unmarked utility line while excavating, stop work immediately. Do not attempt to move or disturb the line. Contact the relevant utility company and wait for their instructions.
Additional Tips:
- Before You Dig (Call Before You Dig) - In many countries and regions, there are national "Call Before You Dig" programs. These programs provide a central contact point for contacting all utility companies in your area. Utilising this program simplifies the process of locating underground utilities. You can find information on such programs in your local area through online searches.
- Have a Plan - Before starting any excavation work, have a clear plan in place that considers the location of marked utilities, outlines safe digging practices near these lines, and who to contact in case of an emergency.
By prioritising utility location and taking these precautions, you can significantly reduce the risk of accidental damage to underground utilities during your Twinwall drainage system installation. Remember, safety always comes first!
Additional Tips for Planning a Successful Twinwall Installation
While all the information provided above should equip you for a well-planned Twinwall drainage system installation, here are some additional tips and repeated advice (because there are some things we can’t stress enough) to ensure a successful project:
Consult a Drainage Professional
While you can install a Twinwall drainage system yourself for smaller projects, consulting with a qualified drainage professional can be highly beneficial, especially for:
- Complex Projects - For intricate drainage needs, professional expertise can ensure an optimised system design, proper component selection, and adherence to regulations.
- Technical Challenges - Drainage professionals can help you navigate technical challenges like complex layouts, significant elevation changes, or integrating the system with existing drainage structures.
- Peace of Mind - Having a professional assess your project and guide the installation process can provide peace of mind and ensure your system functions effectively.
Plan for Weather Conditions
While Twinwall drainage systems are designed to be durable, it's wise to consider weather conditions during installation:
- Avoid Saturated Ground - Heavy rain or wet conditions can make trenching more challenging and potentially lead to trench collapse. If possible, schedule your installation for dry weather periods.
- Extreme Heat - Very hot weather can make working outdoors strenuous. Schedule work for cooler parts of the day or take extra precautions to stay hydrated and avoid heat exhaustion.
Use the Proper Backfill
Backfilling the trench is a crucial step in completing the installation. Here's what to consider:
- Backfill Material - Crushed stone (gravel) is typically recommended for backfilling Twinwall drainage trenches. The specific size and gradation of gravel might be specified by the manufacturer or drainage professional. Avoid using clayey soils or other materials that can restrict water flow.
- Compaction - Once the trench is refilled with gravel, it's essential to compact the material in stages. This ensures a stable base for the drainage system and prevents future settling of the ground. Compaction methods might vary depending on the project size and chosen backfill material.
By following these additional tips, you can enhance the efficiency and longevity of your Twinwall drainage system and ensure a successful and trouble-free installation.
And that’s it for our guide to planning and preparing for a Twinwall installation project. Once you feel ready to purchase the components for your system, head over to our Twinwall Drainage section, where we have a comprehensive range of pipes and fittings available to suit most applications. We have also created a comprehensive step-by-step Twinwall installation guide. for domestic applications to help with the next step of your project.
If you feel that you need more information before you go any further, we have a whole series of other Twinwall Drainage articles available to help. Alternatively, you can contact our team of experts, who are always on hand to help with all of your civils and drainage needs.